Color Mixing Marker
Create your own colors.
Color Mixing Marker is a rocket-shaped teaching toy designed for 5-year-olds. It holds separate primary-color ink chambers inside a single marker body. By pushing the wing controls to release and mix different amounts of ink, children can create their own colors and draw with them immediately — turning an abstract concept into a hands-on making experience.
Overview
A marker that turns color mixing into a hands-on drawing experience
Most color-mixing toys show children that colors combine — through filters, light, or experiments. But they don’t let children make a color and immediately use it. Color Mixing Marker closes that gap: a child pushes a wing to release red ink, pushes another to add yellow, and draws with the orange they just created.
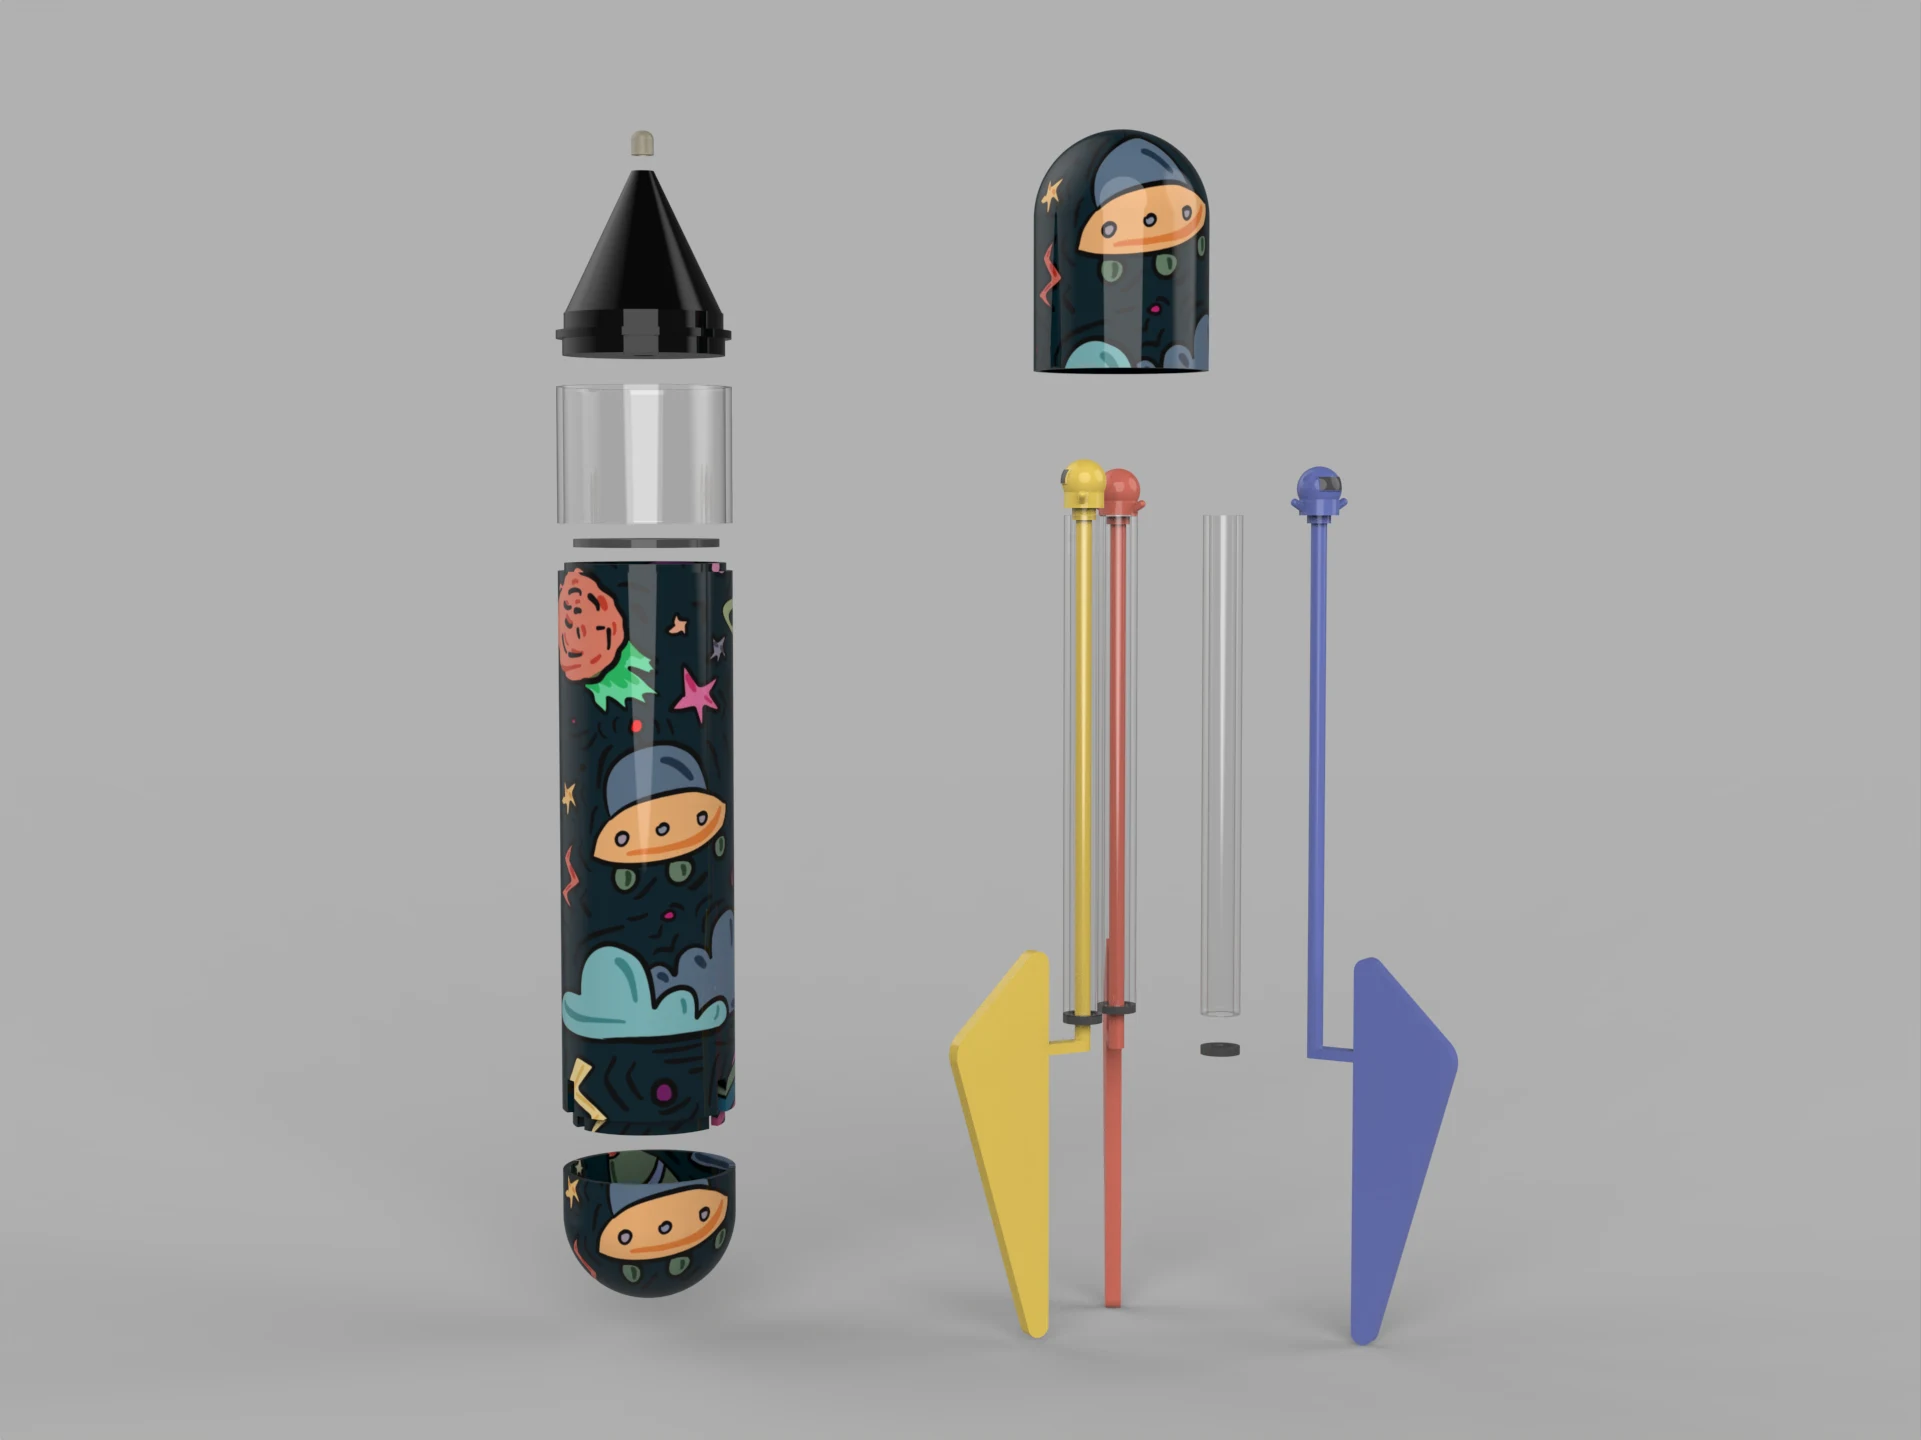
The product contains separate primary-color ink chambers inside one marker body. Releasing different amounts of ink lets children experiment with combinations and see the result right at the tip — no separate mixing step, no waiting.
Concept
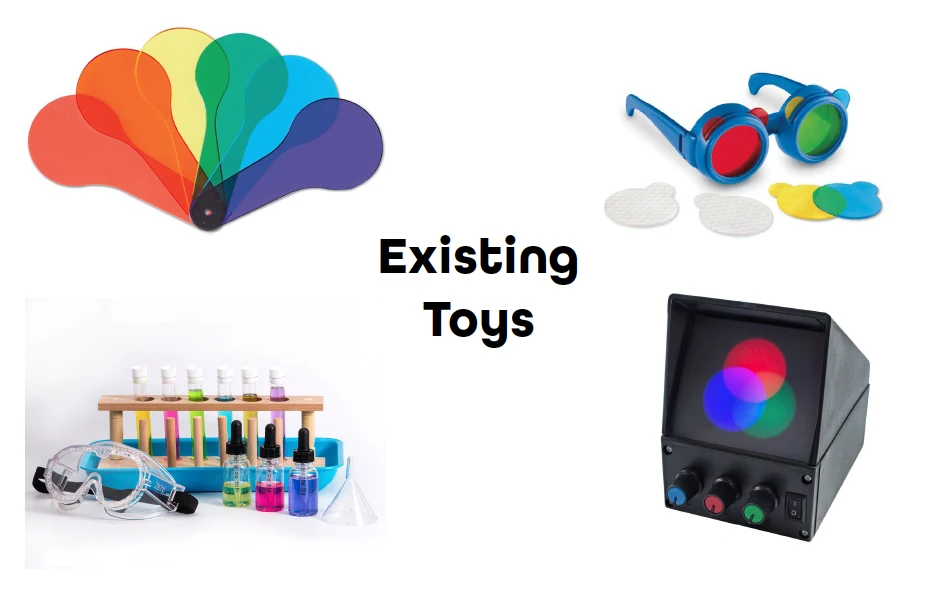
Existing toys showed color relationships — but didn’t let children make anything
Color-mixing toys on the market use overlapping filters, colored glasses, or light boxes to demonstrate how colors combine. They’re good at showing the relationship, but the child is a passive observer. The concept here was different: combine learning and making into one object, so children discover color by creating it themselves.
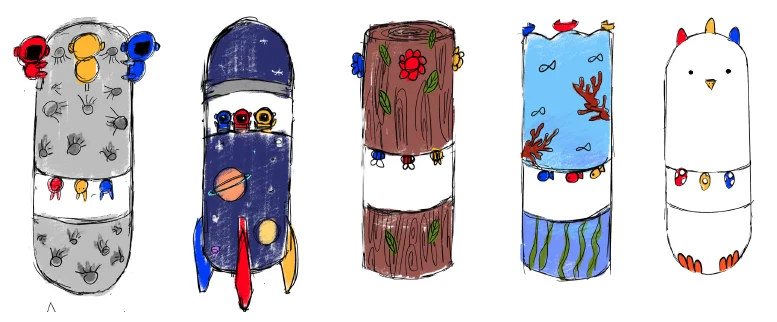
The rocket form made the interaction feel like play, not instruction
Five aesthetic directions were explored — space, woodland, ocean, animal characters, and abstract patterns. The space and rocket direction won because it gave the fin controls a natural home: the rocket’s fins became the ink-release mechanism, so the interaction felt like part of the object’s character rather than a functional add-on bolted to the side. It also made the marker feel clearly like a toy rather than a school supply.
Prototype
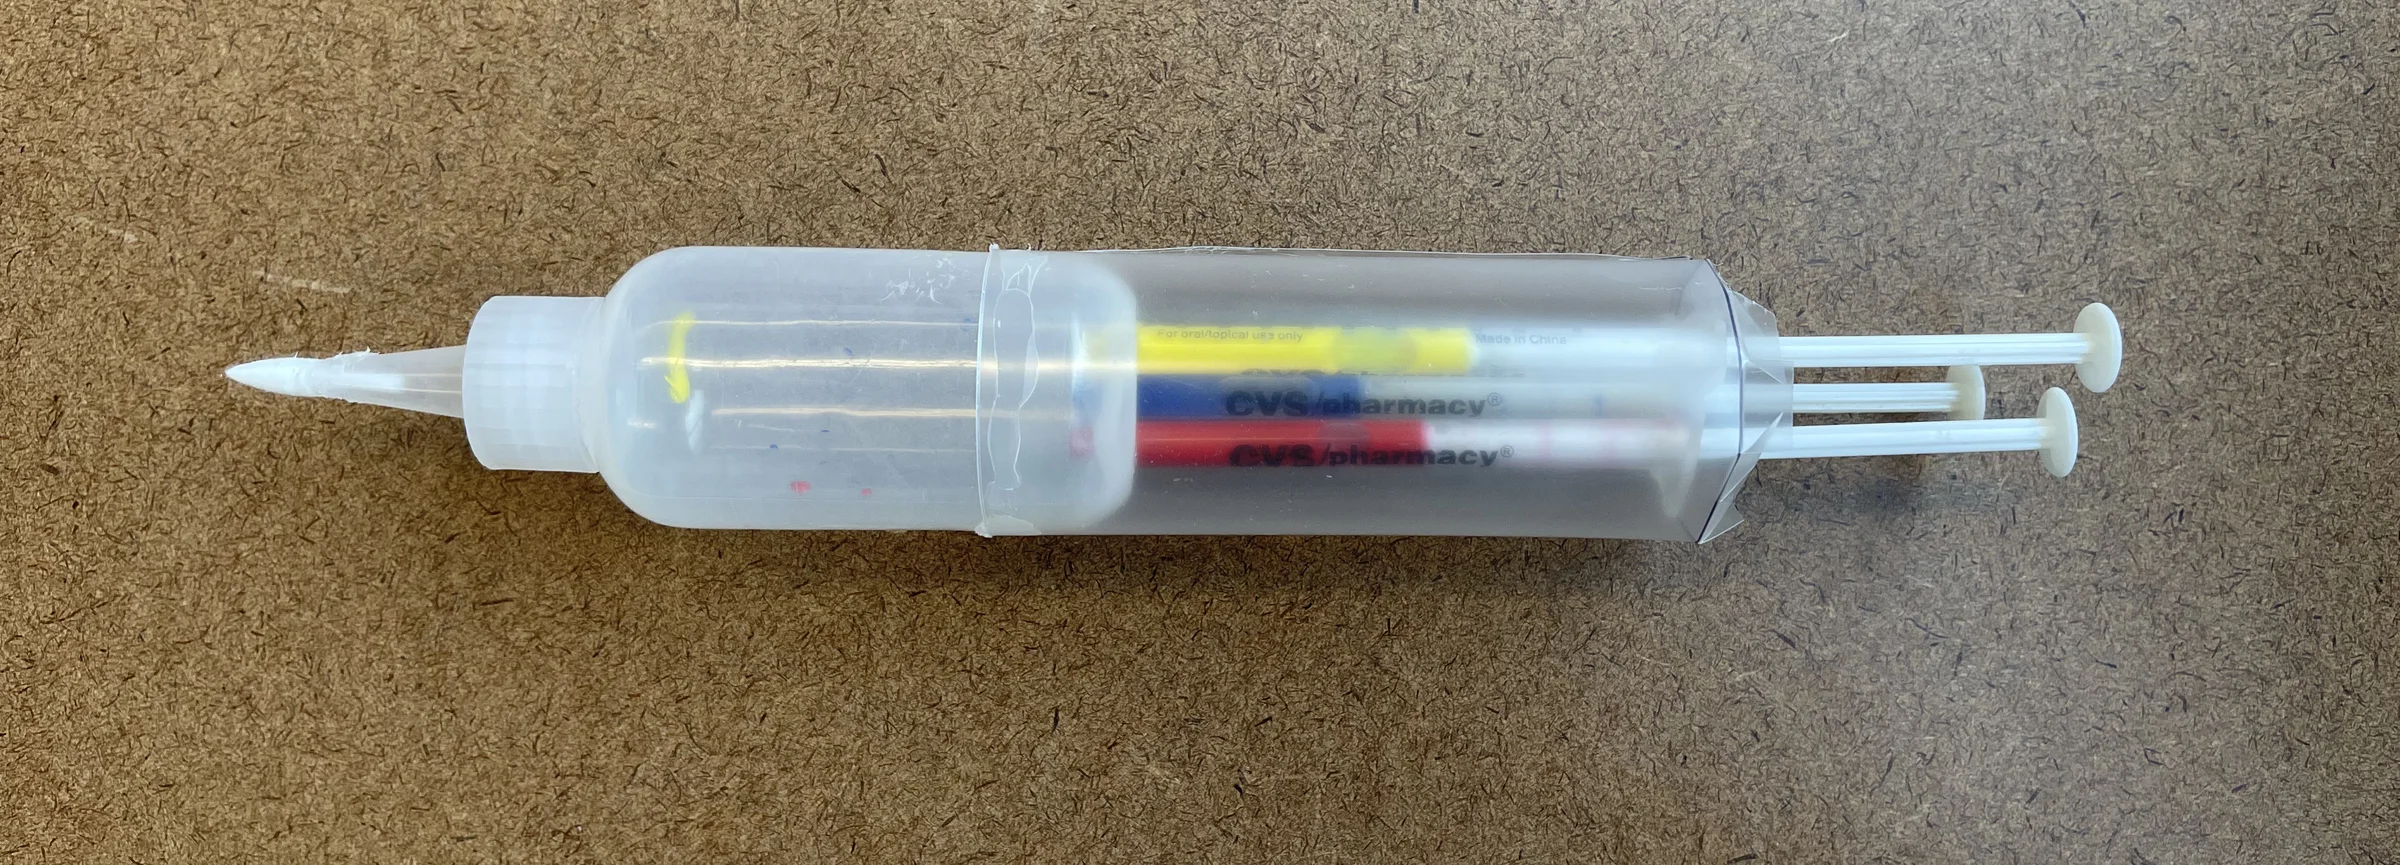
The lo-fidelity model proved the concept — and revealed the mechanism needed to change
The first model used a modified syringe to test whether multiple ink chambers could fit inside a single marker body and feed into one tip. It confirmed the concept worked spatially, but the push-plunger mechanism required too much force and precision for a young child. That finding drove the shift to a wing-based release system in the next phase.
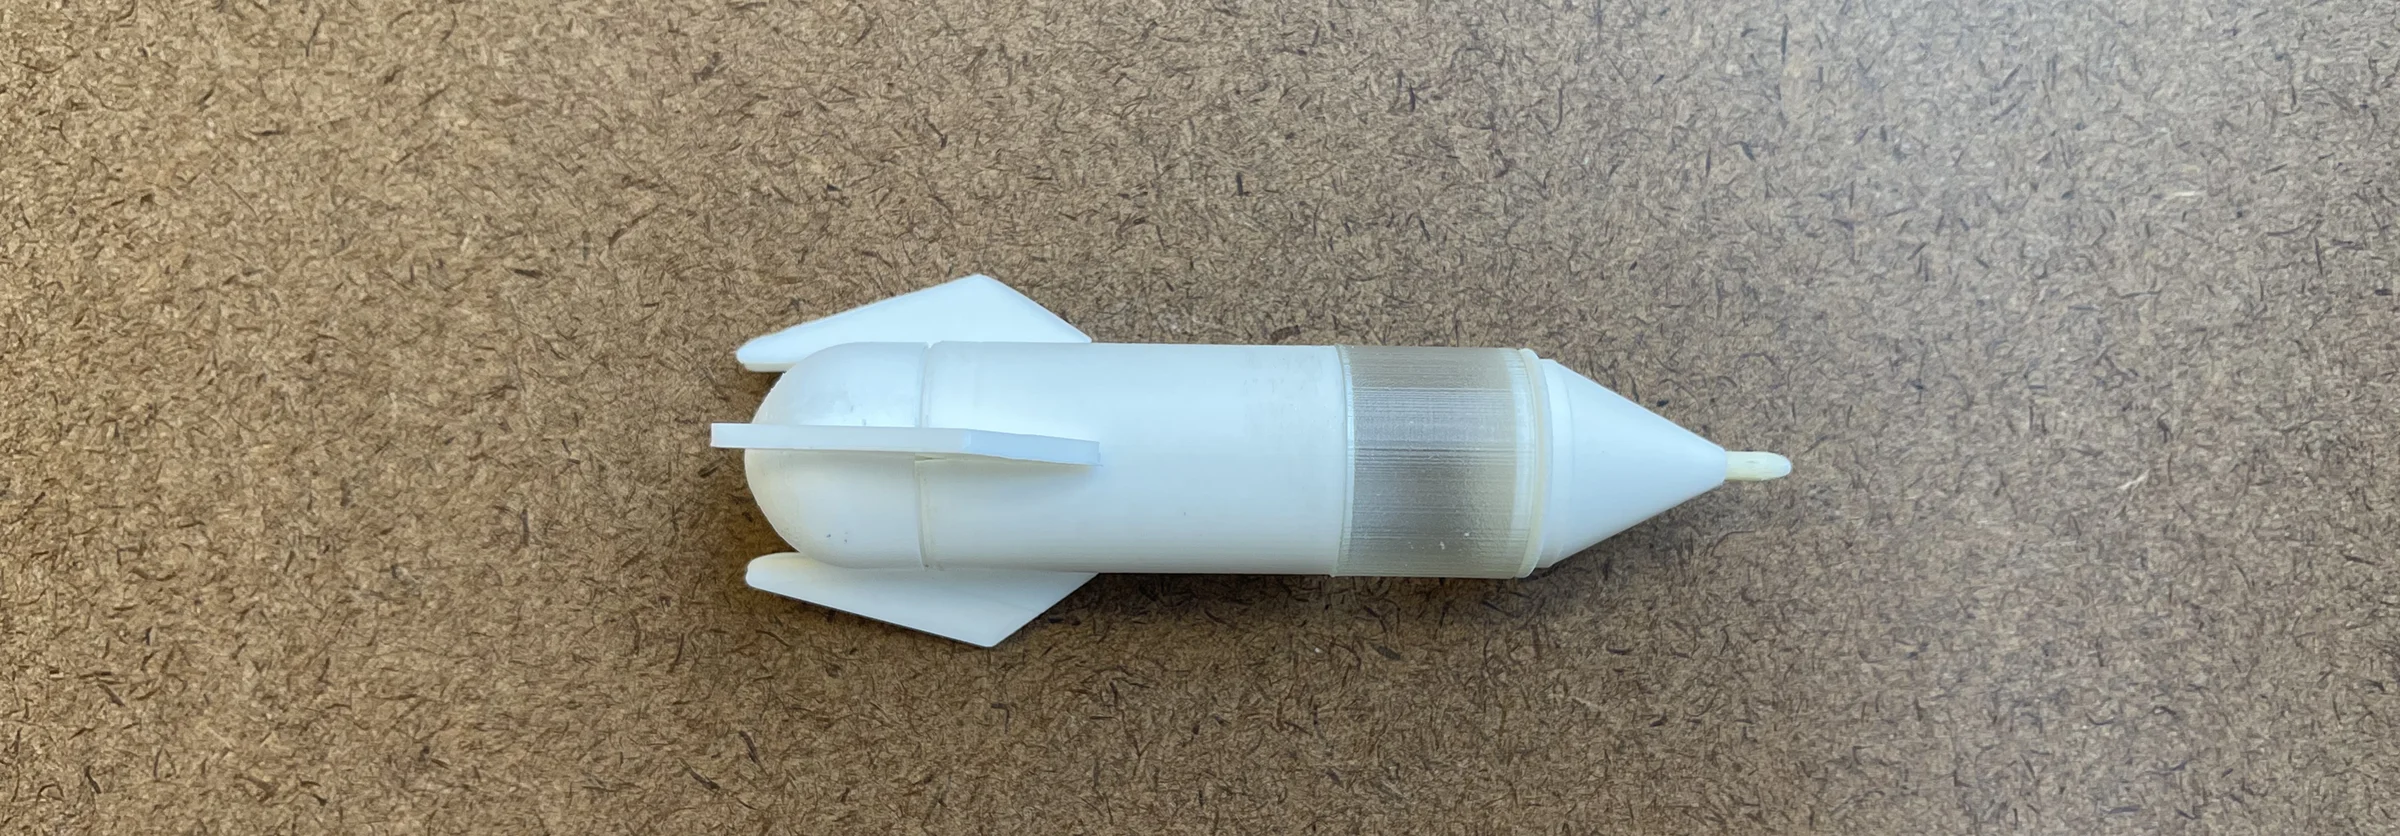
Two 3D-printed iterations refined the grip, proportions, and wing placement
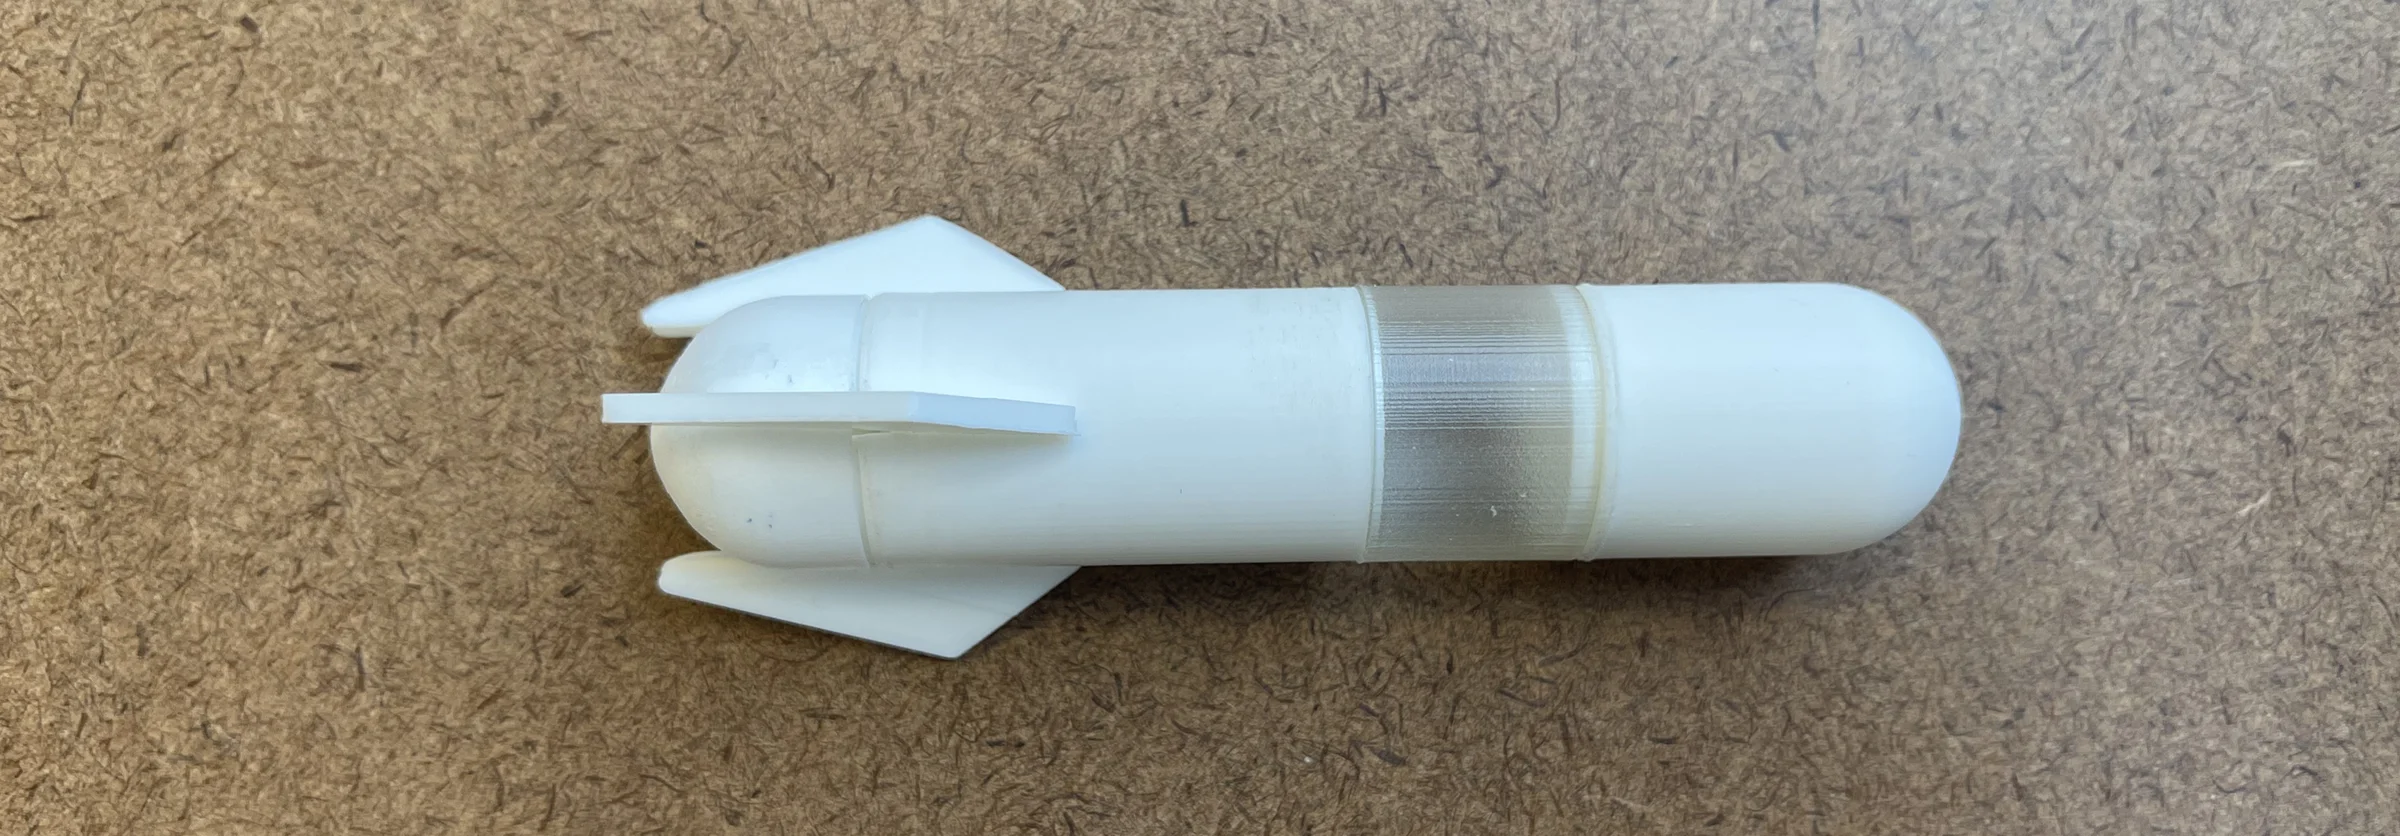
The first 3D-printed prototype established the rocket silhouette and tested the wing controls at a real scale. The fins were short and wide, and holding the marker revealed the grip needed to be longer — a child’s hand wanted more body to hold onto while operating the wings with their fingers.
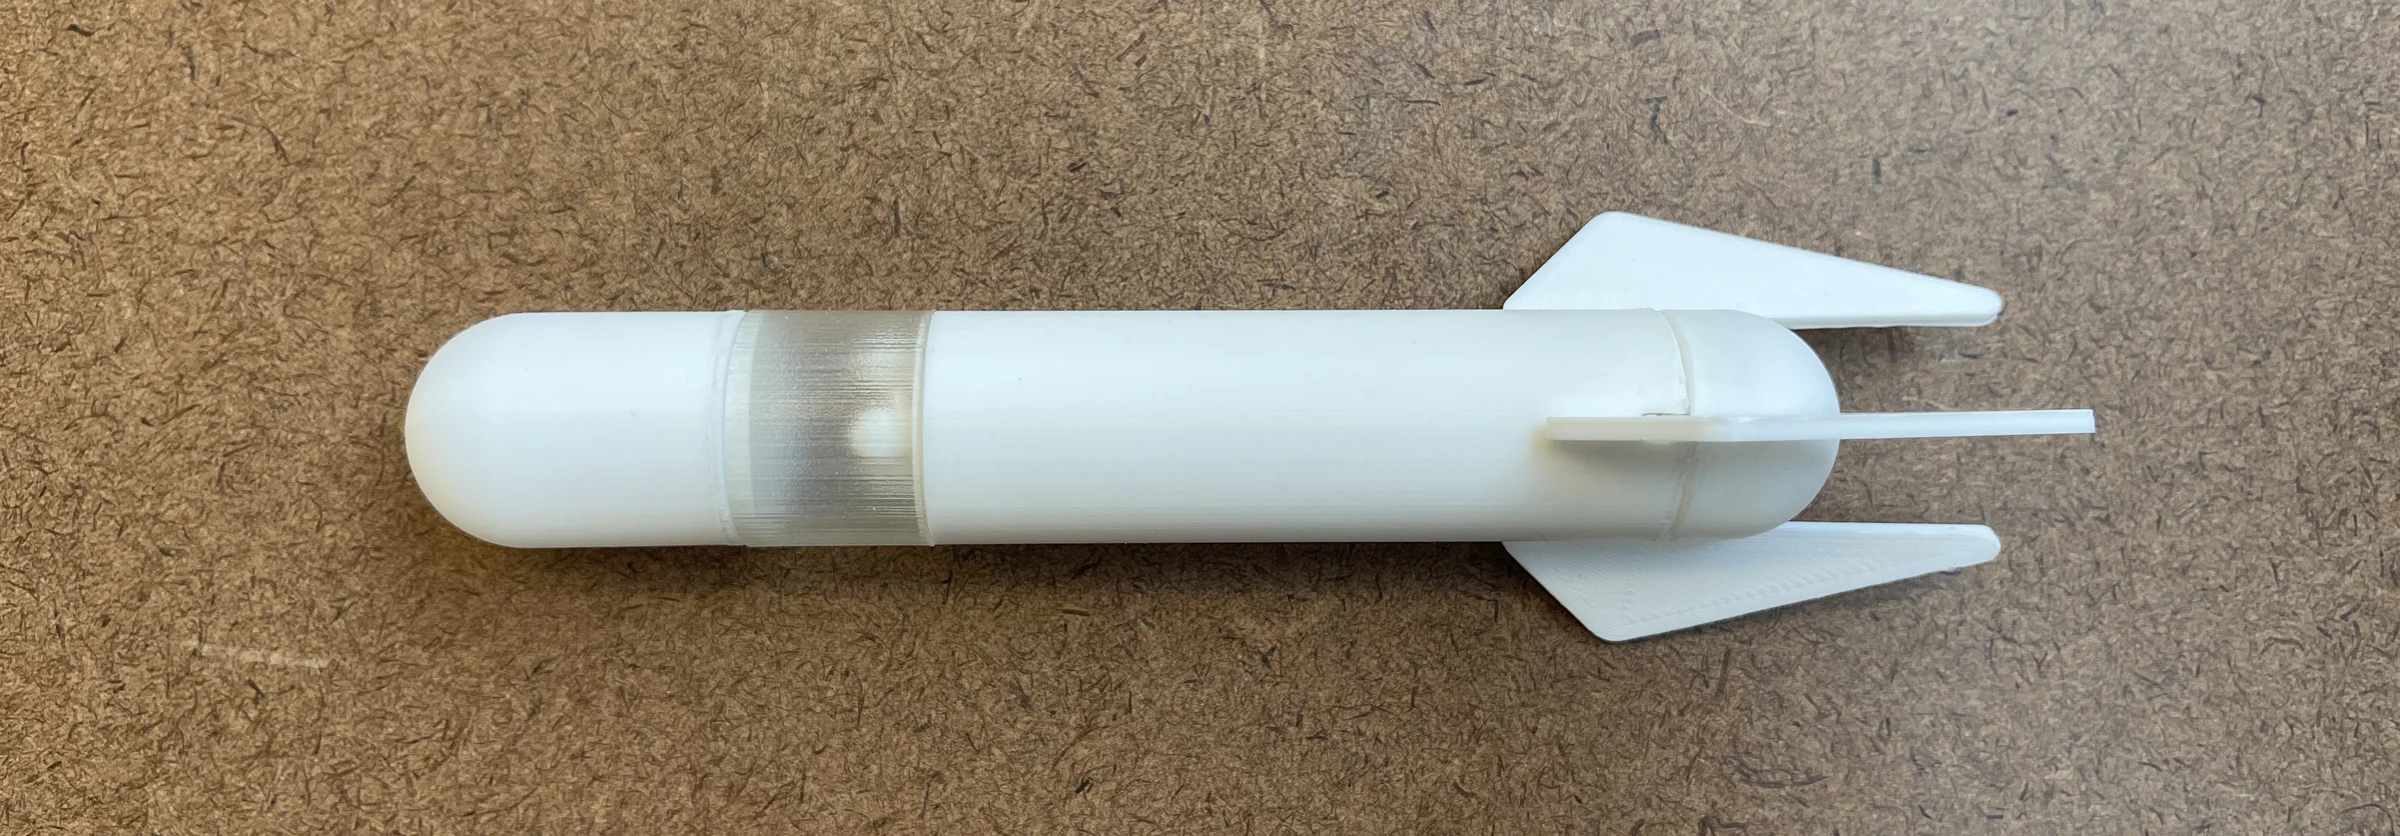
The second iteration lengthened the body, made the transparent upper section more prominent so the ink chambers are visible, and repositioned the wings closer to the tip where the child’s fingers naturally rest. These changes made the interaction feel intuitive rather than effortful.

Final Design
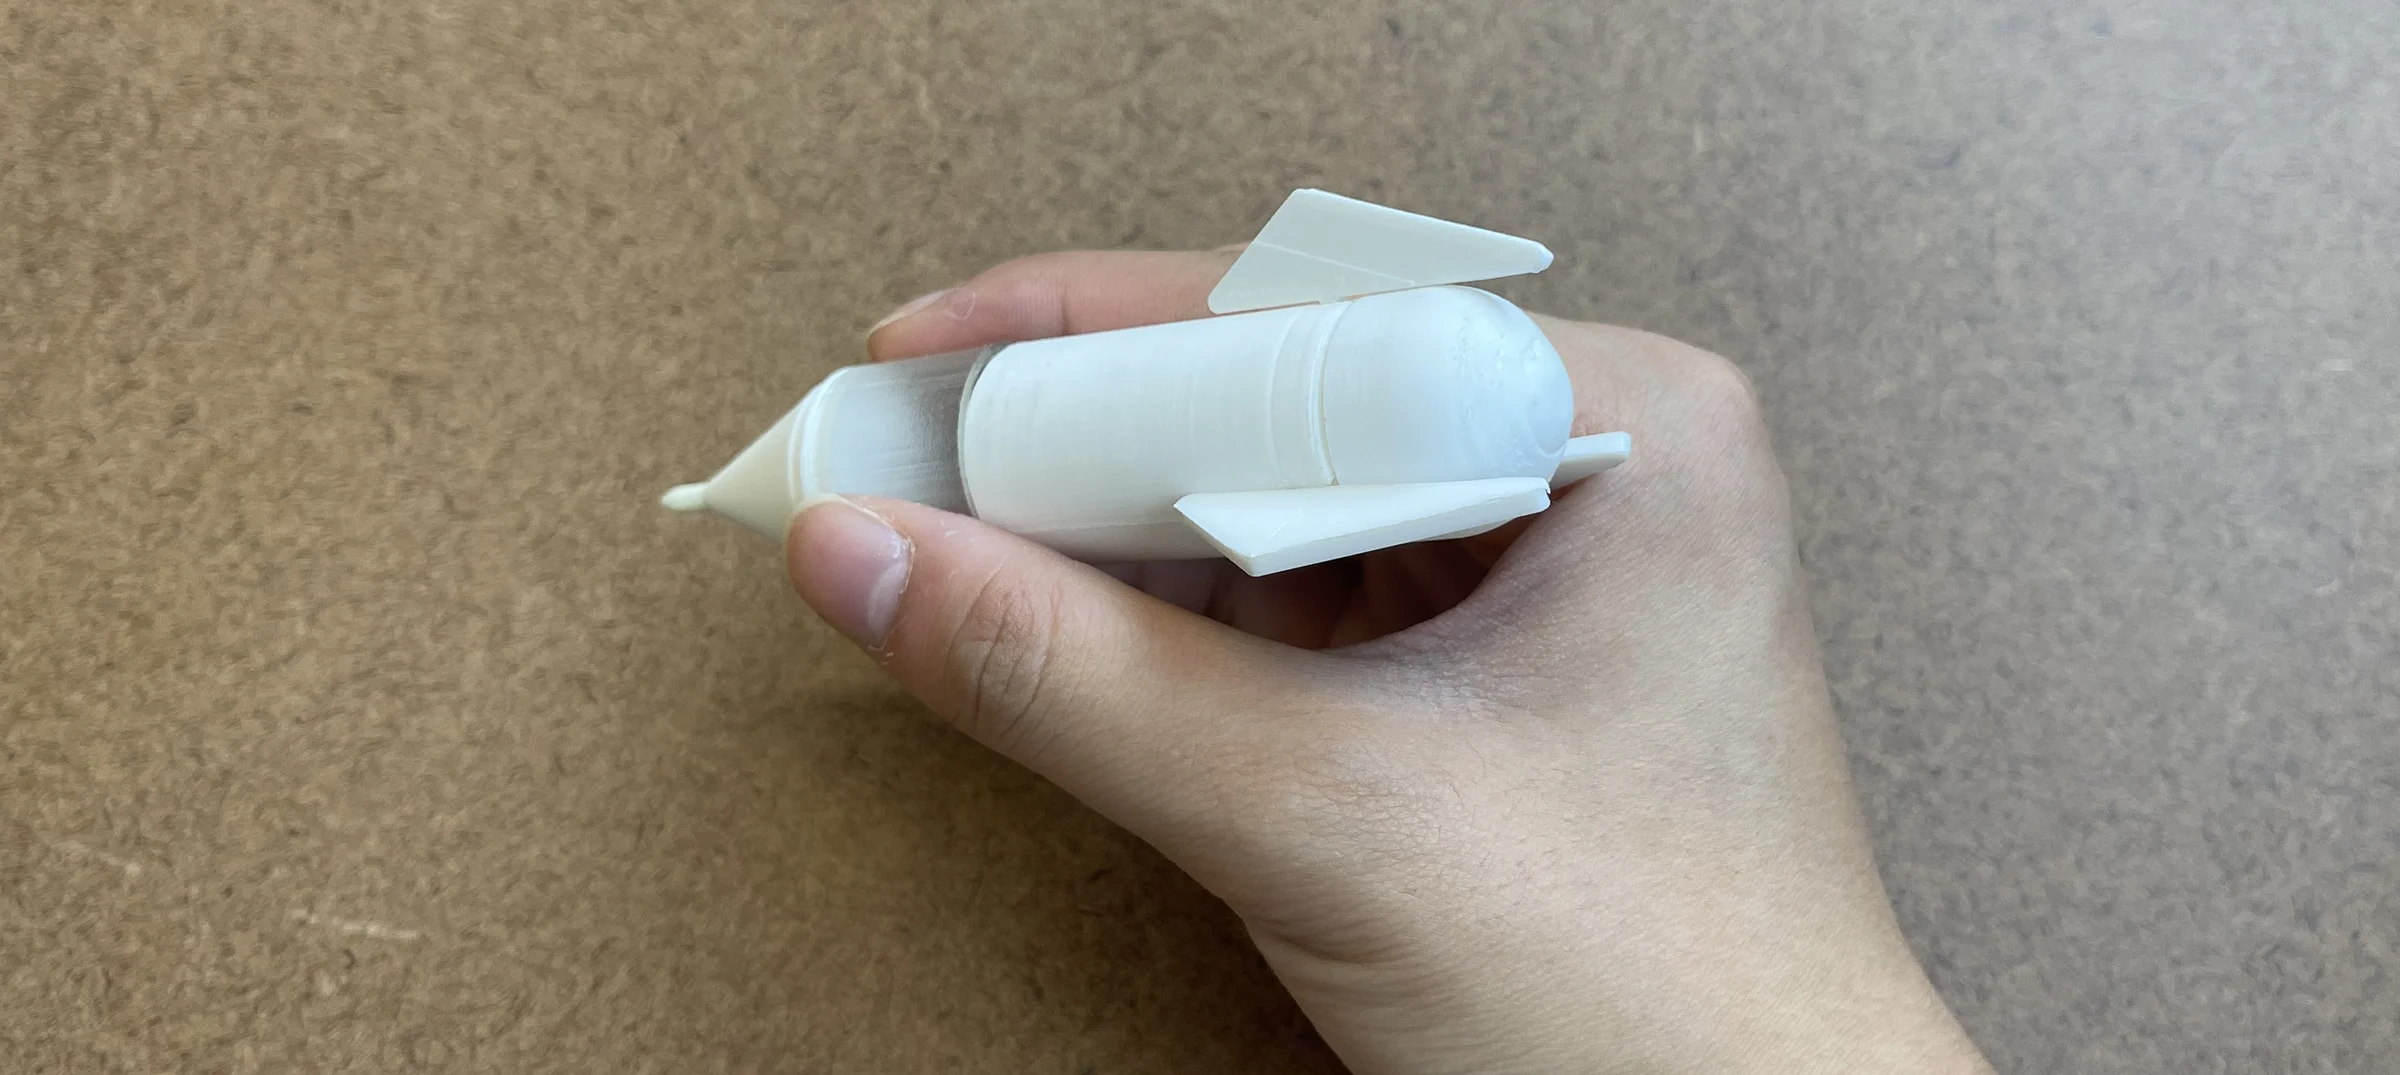
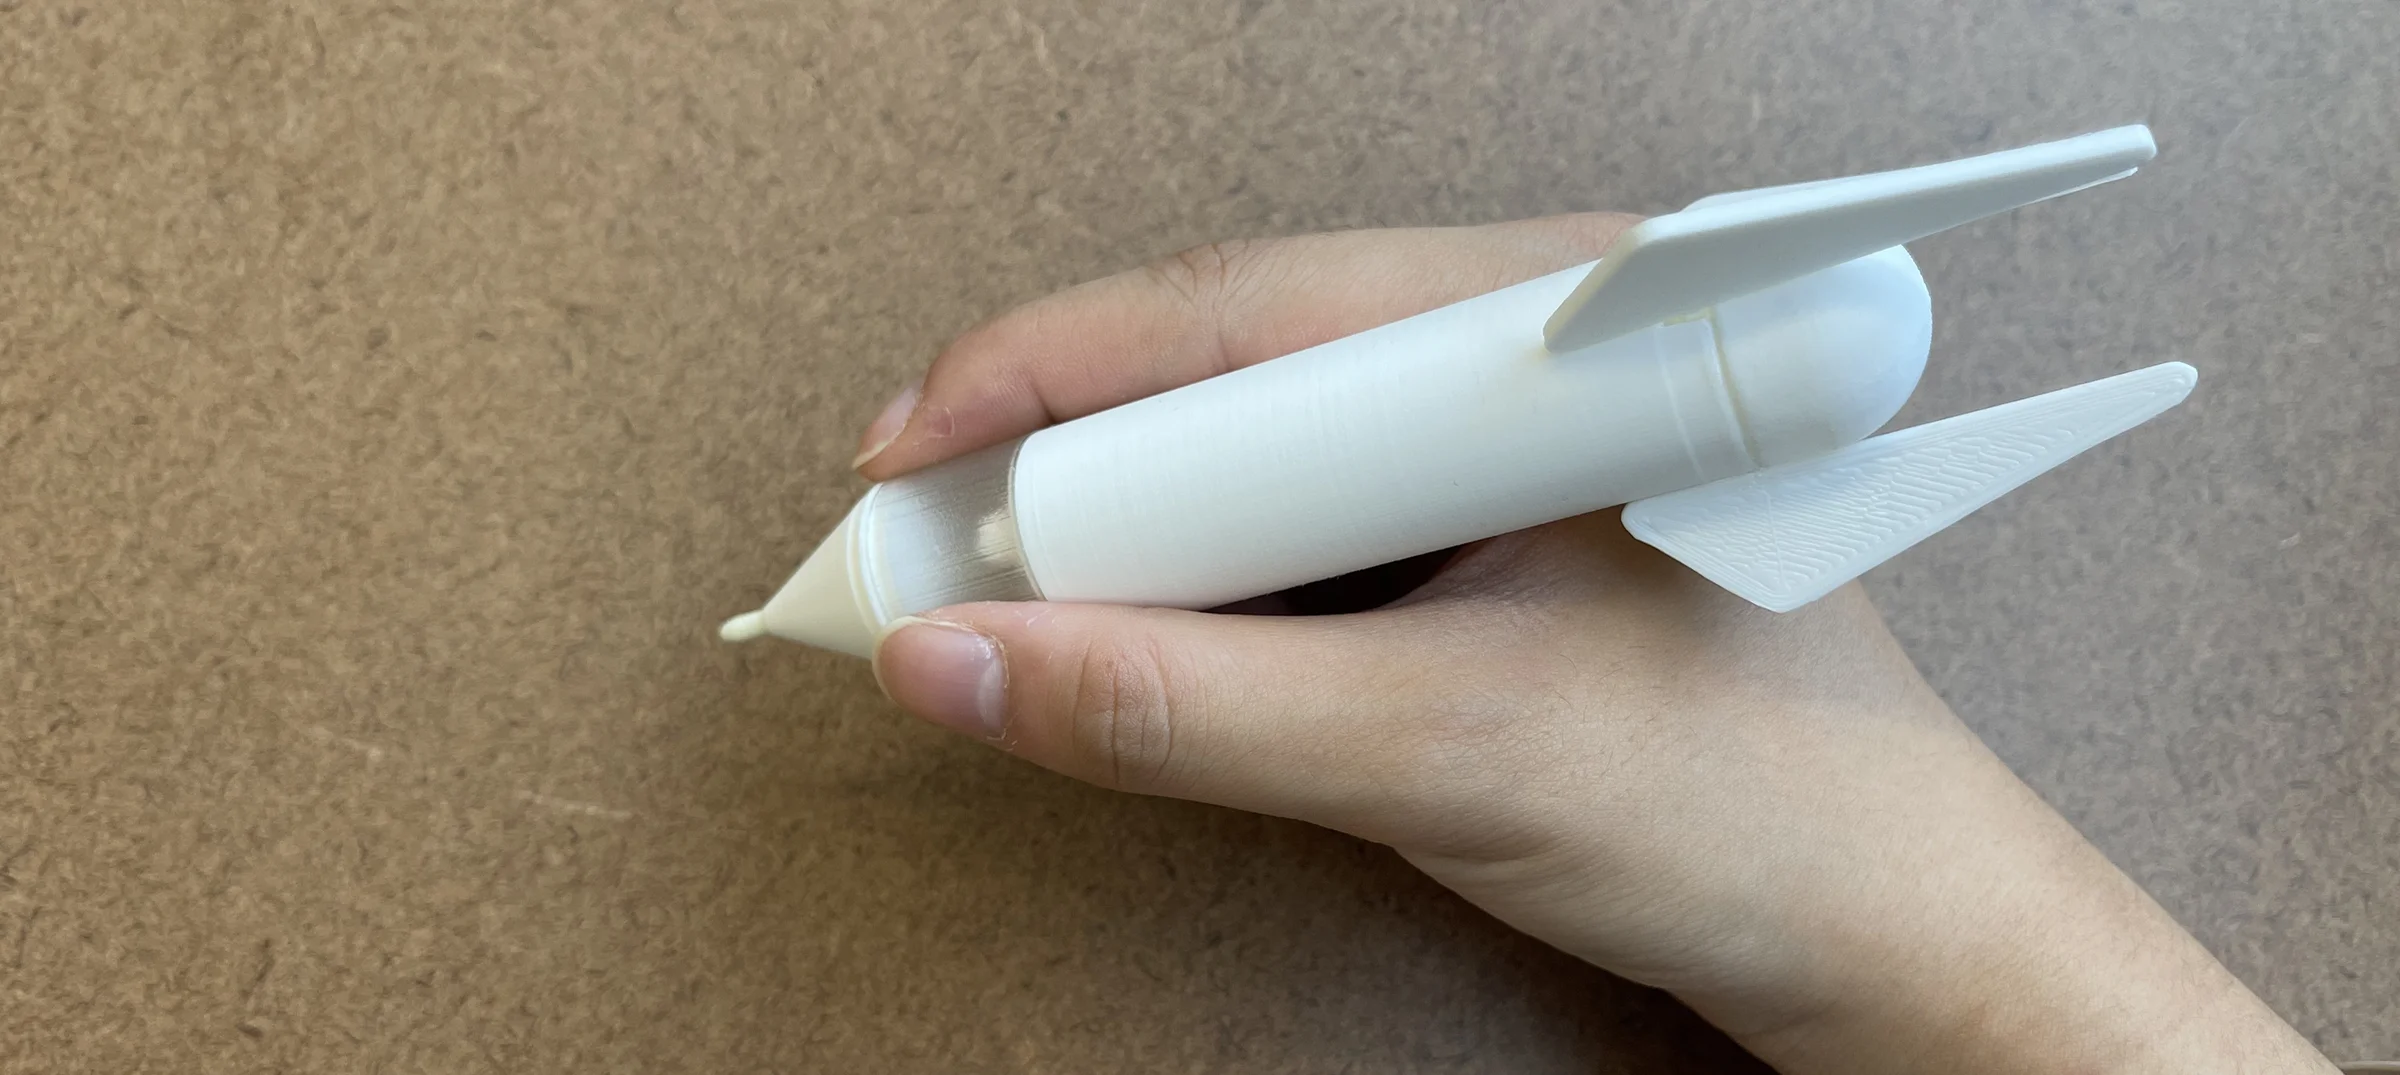
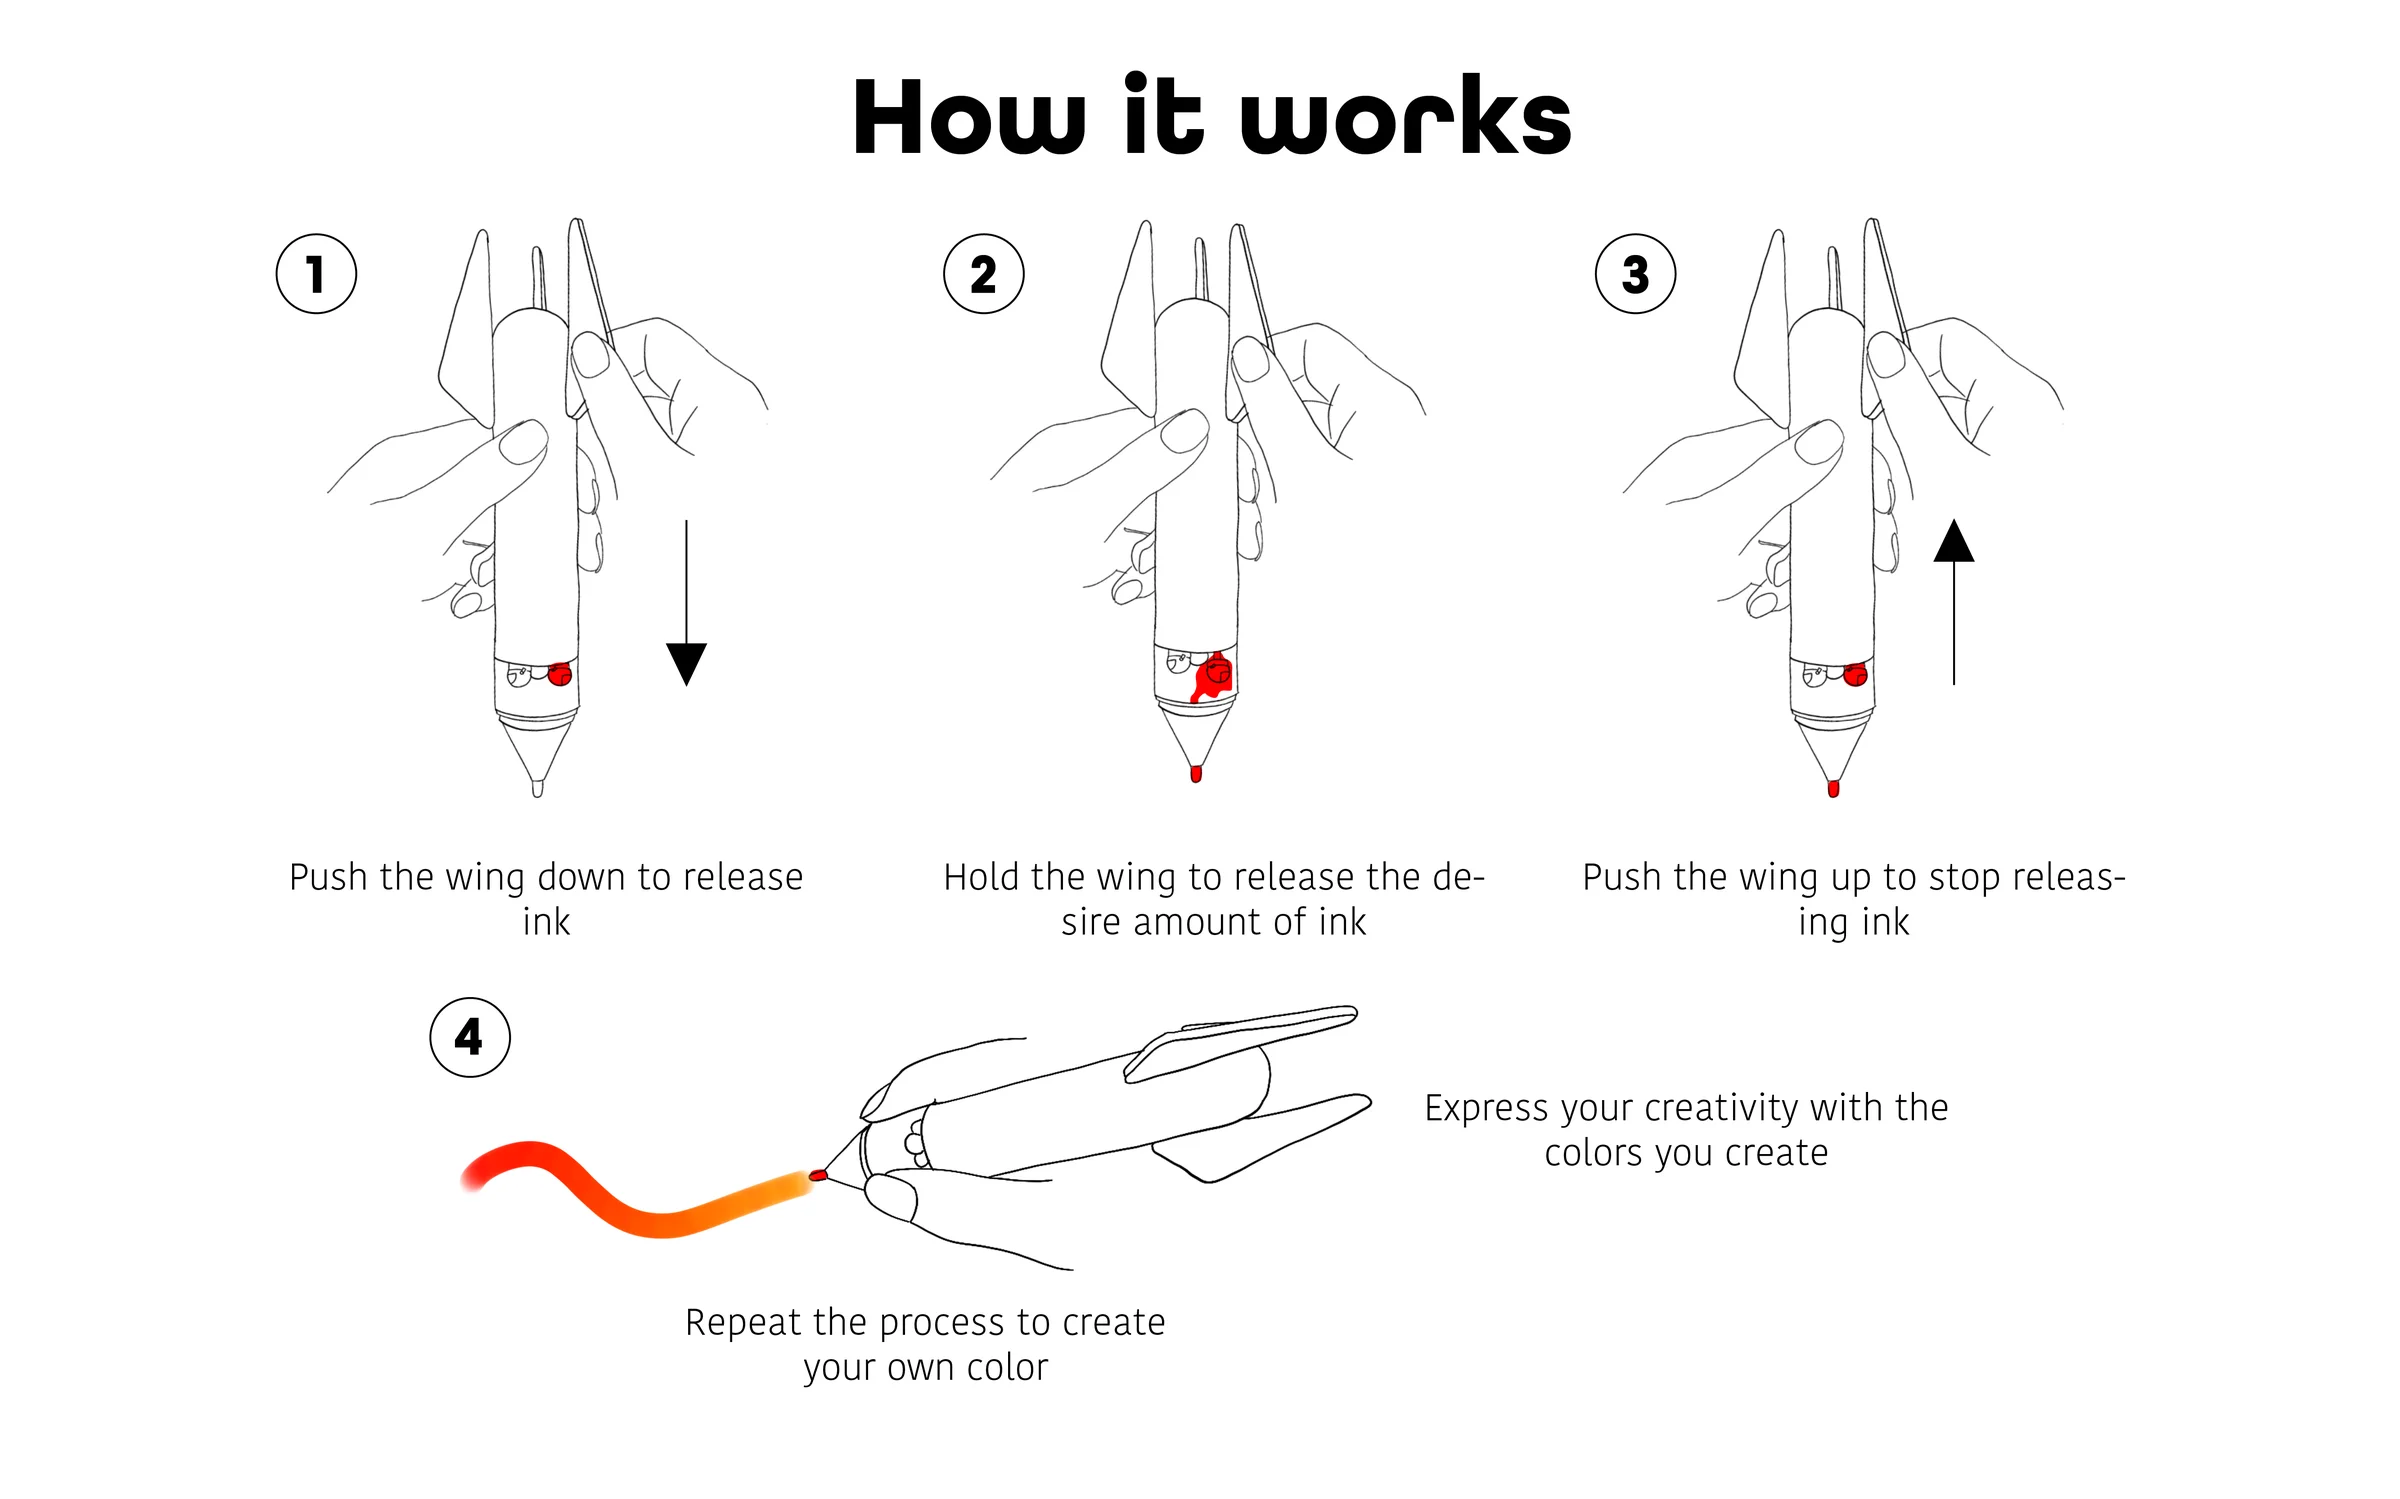
Wing controls let children release and mix ink in four steps
In the final interaction, children push a wing down to release ink, hold it to control the amount, and push it back up to stop the flow. Repeating the process with a different primary color creates a mixed color at the tip, ready to draw with.
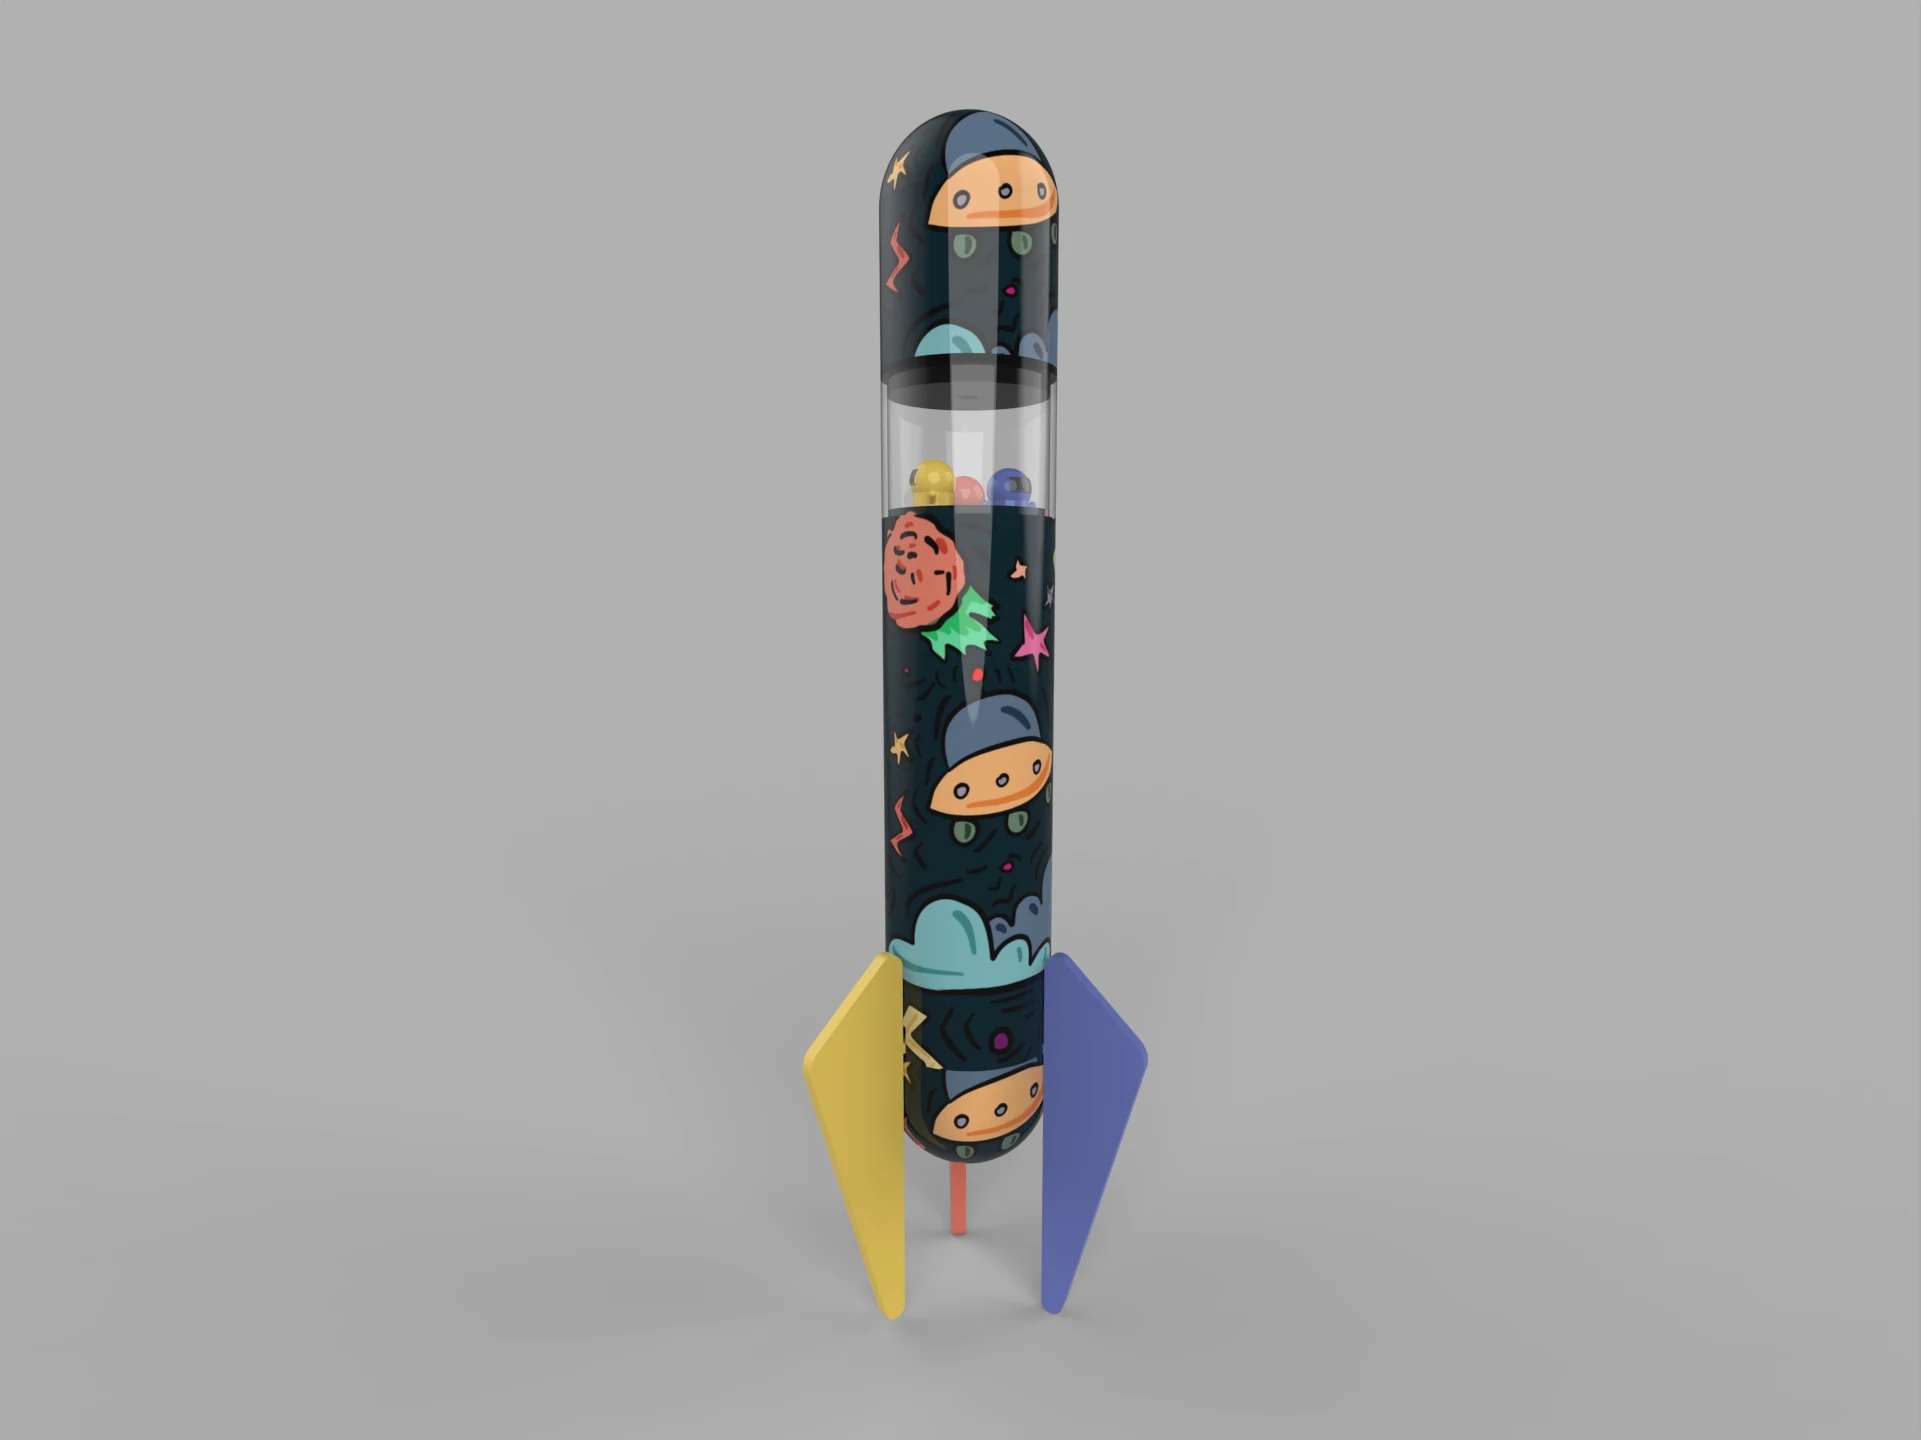
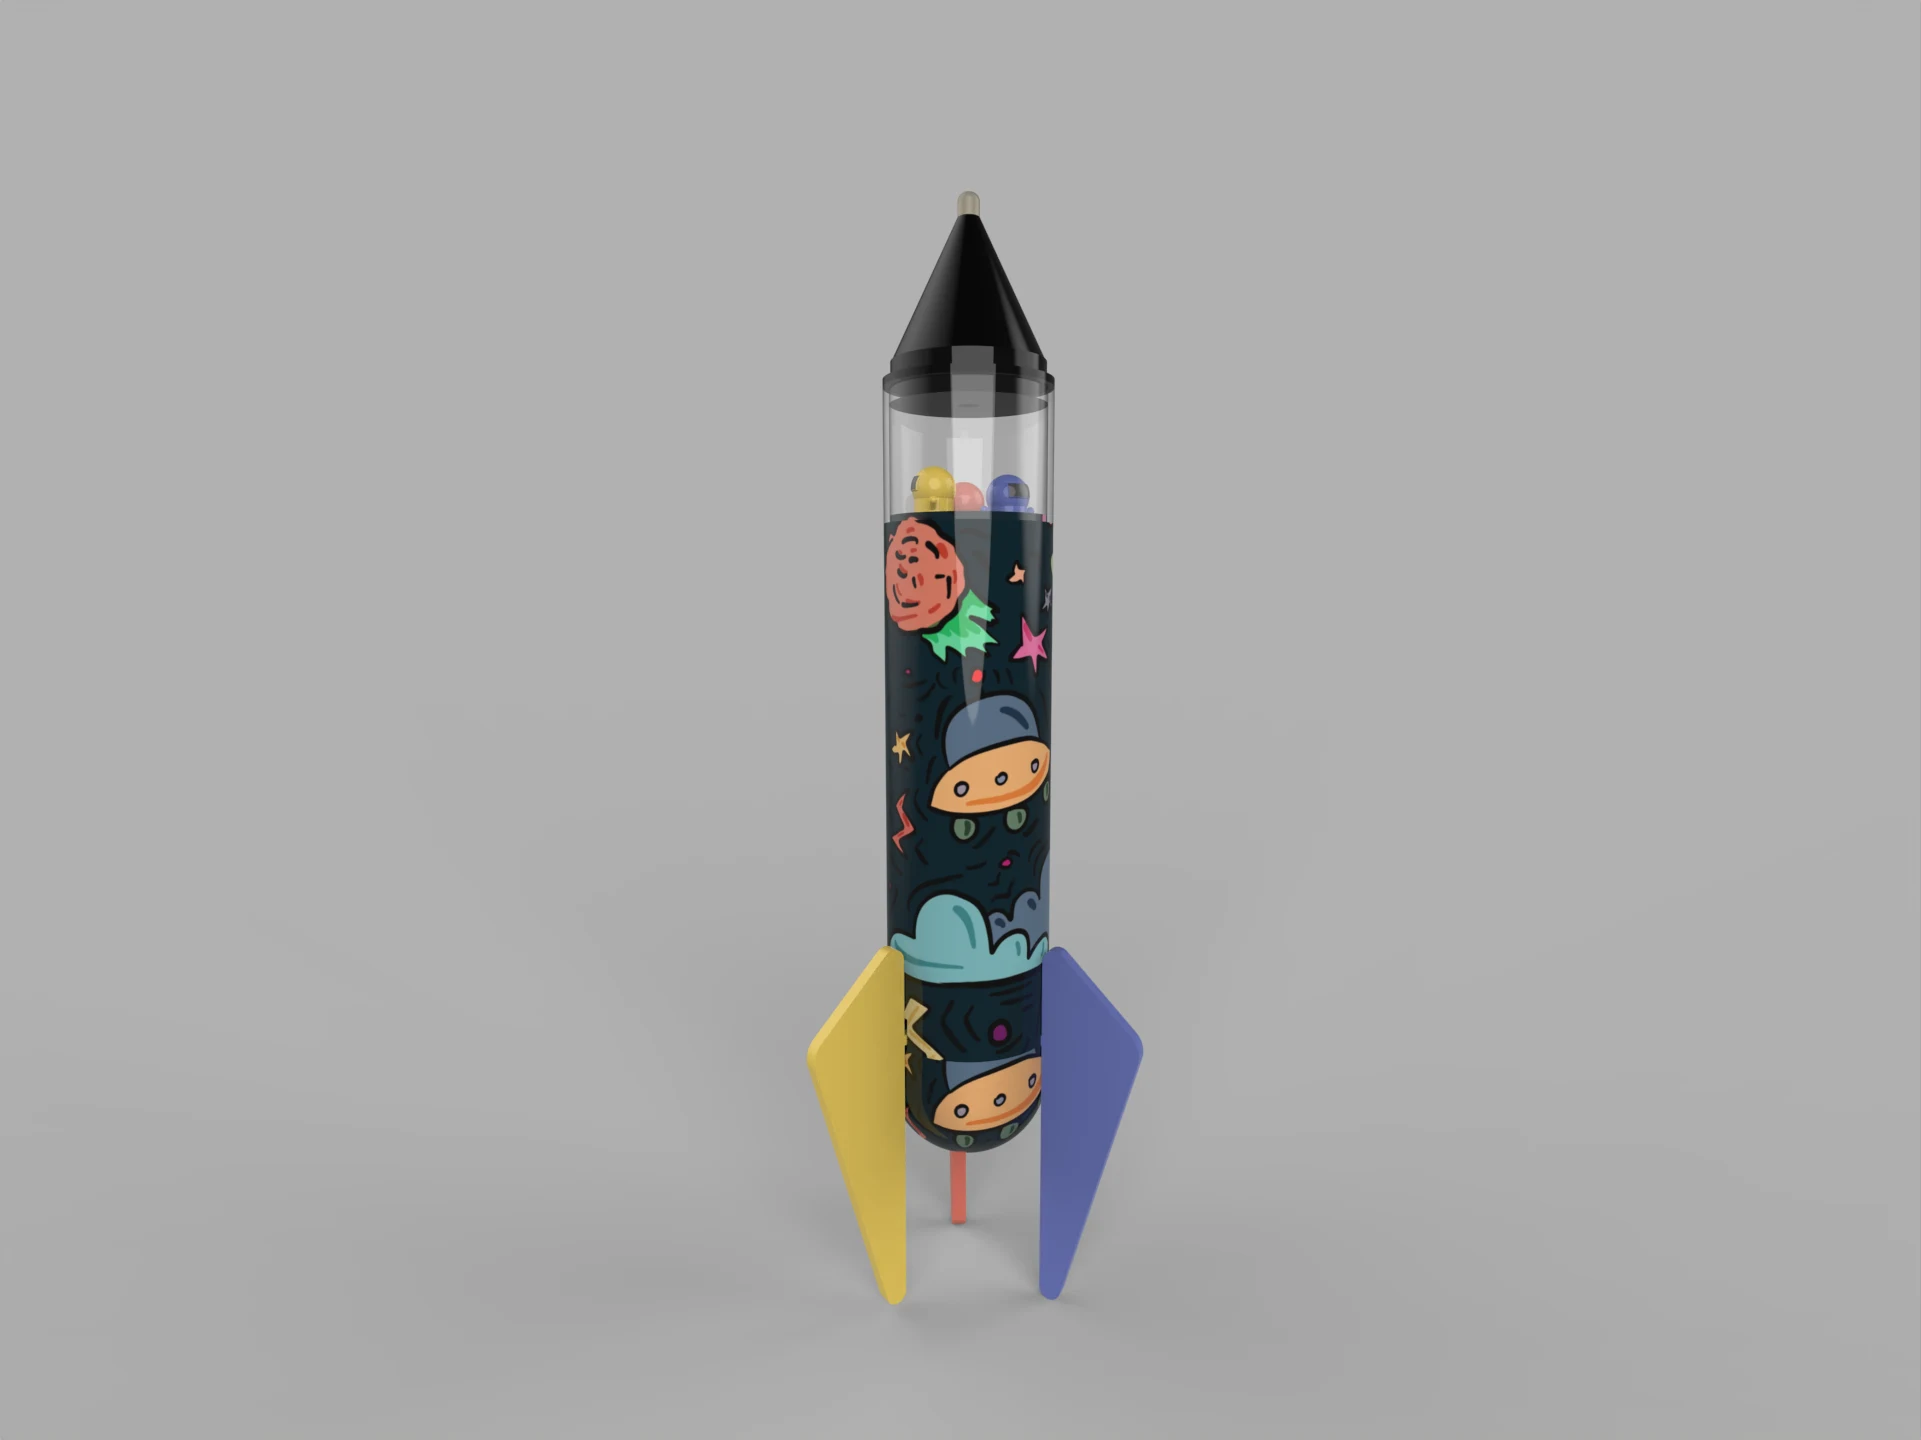
The final CAD model shows the rocket-shaped body, transparent upper section that makes the ink chambers visible, three primary-color ink chambers, and the space-themed exterior graphics. The design combines the familiarity of a marker with the imagination of a toy.
Let's work together.
Currently seeking full-time product design roles for 2026.